Monday, February 28, 2011

Chicken Week Day 1

So with the older kids back into school this week, the younger ones and I at Ducky's have started our new themed weeks.  As mentioned in a previous post, I was finding the Lettered weeks to be a little hard for some of the children, they are mostly between 2 and 3 years of age. I decided to start with farm animals and see how it will go from there.

Today we did the following:

While I was getting out craft project ready I had the children colour 2 pictures.
1: just an egg ( Egg found at Family Crafts on About.com)


2: a picture of a chick that has just hatched (chick in egg can be found on DTLK's chick colouring pages)


These pages will be kept and at the end of the week with will make a little booklet of the stages of growth for a chicken.
Once our coloring was finished we started into today's craft.  We made chickens out of baby food jars.  Who thought, hey???  And I must say we will be using this method a few times over the next couple of weeks while we work on our farm animals.

What you need:
  • Baby Food Jars
  • Craft foam in orange (or you can use scrap construction paper)
  • Tacky Glue or glue gun (I would recommend that you use one of these, we used white glue and it wasn't the easiest!)
  • pompoms in the color yellow
  • yellow feathers
  • wiggle eyes
  • scissors
Directions:
Clean baby food jar. Remove label. Fill with pompoms to make the body of the chicken. Put the lid on and turn it upside down. Glue on wiggle eyes. Cut  beak and feet out of foam and glue in place. Glue 4 to 6 yellow feathers to the back side of your jar sticking up to make its tail.

We also listen to the story Chicken Little today.  As sad as it is, I have what seems like a million and one books in my house and I do not have Chicken Little!  So I found one on the computer and we watched it.  The kids really enjoyed watching it, as for the fact that they know the computer is off limits here, so when they do get to use it a bit, its sure a treat for them.

Author: Christianne C. Jones

Feel free to check out more pictures at Ducky's Photos of today's craft !

Friday, February 25, 2011

Salt Dough Creations

On Tuesday the children and I made salt dough cut outs.  What fun that was!  I made the dough and cut it into equal pieces for the children, rolled them out and tossed all our play dough cutters into the middle of the table and let them go to town.  Once they had cut out what they wanted to, and lets say I rolled that dough out at least 50 times, between all the children, we placed our pieces on cookie sheets and baked them.  Half my children left just after lunch (with no school the girls dance was moved to the middle of the afternoon, instead of after school like usual) so I decided that we would wait until today to paint our master pieces.

Now today was the special day to paint these little trinkets.  Out comes the large garbage bags to cover my table, the 14 jars of paint and all the paint brushes I could find around the house.  To town the kids went with painting.  What kid doesn't like to paint????  Once we were done painting our cut outs on to what else.... FINGER PAINTING of course.  What a blast, what a mess!  But the joy they had doing all of it and the joy I had cleaning off 6 kids and all the paint brushes. 

Here's the recipe I used for our salt dough:
Ingredients: (I tripled the recipe and found it was more then enough for 6 kids)

  • 1 cup of fine salt
  • 1 cup of flour
  • 1/2 cup of water (may add more)
Instructions:
  • In a large bowl, combine the salt and the flour
  • Make a well in the salt/flour mixture and add the water
  • Knead until smooth and shape into a ball
  • When not in use, wrap in plastic or store in an airtight container 
  • Bake at 350 F for 10 minutes or until hard
HINT: To get a softer dough you can add more flour. Adding more salt will lend a more granulous affect. To add color to your dough, use different types of flour or add food coloring or paint.
Knead to get an even color.


Additional pictures are displayed on: Ducky's Photos

Thursday, February 24, 2011

Lava Lamps

While real lava lamps rely on special ingredients and secrets, we made our own at home ones today.  The kids had a blast learning about the science (those that understood what I was talking about!) of how water and oil don't mix.  The younger ones were just amazed at how cool these lava lamps looked when they got to shack them up.


What you will need:
  • glass container (you choose the size, I used medium salsa jars.  That way they aren't to big or to small, but you could use sealer jars, canning jars, baby food jars......)
  • oil of any type (I used baby oil, cause I had left overs from one of our Christmas projects, to which I found at the Dollar Store.... I would recommend using olive oil or any expensive oil, not that it would change the out come, its just that you might as well save the money and use something a little cheaper)
  • Food coloring
  • glitter, sequences, small beads..... (we just used sequences)
  • Hot glue gun (or better yet, clear silicon if you have some around home)
Here's how we made these "AWESOME" things ~and most of you have the items floating around your own home.

  1. Fill the jar about a third full of your oil
  2. Sprinkle your glitter (or what ever you want to use that is sparkly and eye catching) on top of the oil
  3. Add water to nearly the top of the jar (I went about 2/3 of the way up, for this step)
  4. Add a few drops of food coloring to make your desire color of water
  5. Finish filling the jar with water, don't go right to the top but pretty close
  6. Add your hot glue or silicone to the inner lip of the lip and screw on to the jar 
  7. Run another bead of glue around the edge of the lid to make sure it is sealed well (after I did this I wrapped a pipe cleaner around the glue just to kinda hide it
  8. Flip jar over, back and forth, shake it up!!! Fun some fun watching what happens.
After our lamps were made I let the kids decorate the lids to hide the writing from the original use of the jar and we put each child's name on their jar with foam stickers too.  

Check out Ducky's Photo's for additional pictures of our craft/science project.

Wednesday, February 23, 2011

Update!

Please note that I have now added a few extra pages to Ducky's Life.

1: Ducky's Weekly Food Meny
2: Ducky's Photo's

You can find links to these pages on the right hand corner of the blog page.  I hope you all enjoy and remember to check back often! 

Every time a do a new post I will add additional photo's in Ducky's Photo's, so feel free to take a long.

Thank you for follow along with Ducky's and our activities we do!!!

Sun Catchers

Home made sun catchers were a big hit for us today.  As there is no school this week for children in our area I have the task of keeping older one busy.  I am not use to this as most of the children in my care have always been a little younger.  Sure I have a 6 year old of my own, but still when you have two boys that age and two 8 year old girls, I was scared to death for this week.  I enjoy children, but have never had to entertain that many older ones.  So back to the wonderful world of the Internet I went and found some fun activities for them to do.

Today we made sun catchers as mentioned above, the kids wanted to go outside this morning, but lets face it..... when it is -29 Celsius out there, I knew it wouldn't last long.  It would just be to cold for them.  Even with the sun shinning away and making it look so nice out.  So instead we started talking about how the sun plays little "tricks" on us.  Just because it is bright and shiny out there doesn't mean its warm (at least not in the winter, in the middle of Saskatchewan).  Once I got the kids on the topic of the sun shinning in my dinning room through the windows, that's when I got the idea to make the sun catchers.

I have the pleasure of owning a small laminating machine (of course it was bought from Walmart!), so this was one craft that I could use it for, not just to laminate already done pictures and crafts, like have have always done with it before.

Here's what we did:

First those that were old enough, I had them cut out shapes of their choice from construction paper.  The younger ones, I did it.


We then cut the inside of their shapes out so we only had an out line of it and the centers were totally open. 
I then had them rip tissue paper into small pieces, again the colour of their choice.  


We then placed the outline of our shapes on the laminating paper and the tissue paper on the inside of the shape.


Once they were finished we put them into the laminating machine so the two plastic sheets would melt together.  Lets just say most of the children thought this was the greatest thing, watching the sheets come out the bottom of the machine, looking totally brighter and even different then they did when we first put them in.
It was great fun and kept them busy for a while, after all was done we punched holes in them and tied some ribbon around it to make a string to hang them in front of the window.


Now if you don't have a laminating machine or don't want to buy one cause you don't think you will use it enough, you could always use contact paper.  You can find it at any art or office supply store, some stores even carry it in different colors!  This paper is like tape almost, just in a sheet of 8"X11" usually, you peel the backing off of it to expose the sticky surface.  Place you outline and tissue paper on it then take another sheet and place on top of all that.  This way is shinny on both sides and nothing falls out or off.

Thursday, February 17, 2011

A review from Experience

So over the last while I have tried a number of different activities and crafts with my children and the ones in my care.  We have done letters or numbers assigned to the week and I have also done weeks of just concentrating on a certain object or theme.  I have found that most of the children in my care and younger and the numbers and letters seem to be a little to advanced for them still.  On this note I think I might set those to the side and base my weekly crafts and activities on themes instead.  It will more a less be the same but instead of that letter Aa, we will work on birds or transportation, and continue learning about that theme for the full week.  I know my own daughter loved the letters we were learning so I will continue teaching her on the side, in the evenings and on the weekends.  I will continue posting our weekly activities and crafts for all to see, but I just wanted to send a quick note out to you all that things have changed a bit.  I will round this week off with finishing the letter Bb, and we will start our new lessons next Tuesday as Monday is a holiday here (Saskatchewan). 

Thank you for following along with Ducky's Arts and Activity Centre and I hope you enjoy the new program!
Baby Bumble Bee

I'm bringing home a baby bumblebee,
Won't my mommy be so proud of me,
(Cup hands together as if holding bee)

I'm bringing home a baby bumblebee,
Ouch! It stung me!
(Shake hands as if just stung)

I'm squishing up the baby bumblebee,
Won't my mommy be so proud of me,
('Squish' bee between palms of hands)

I'm squishing up a baby bumblebee,
Ooh! It's yucky!
(Open up hands to look at 'mess')

I'm wiping off the baby bumblebee,
Won't my mommy be so proud of me,
(Wipe hands off on shirt)

I'm wiping off the baby bumblebee,
Now my mommy won't be mad at me!
(Hold hands up to show they are clean)


Tuesday, February 15, 2011

Snow Day

Snow Day, not the kind that the children miss school because of ugly weather and are stuck inside making all parents crazy.  Today was an outside day!! YEAH, seems how its been so darn cold out or windy out that I don't like to take the kids outside often and with my little one having a small circulation problem, he gets cold really fast and it takes him along time to warm up again, we haven't made our way outside a whole lot this winter.  But today was sooooo nice, I couldn't pass on it.  I layed the little one down for a nap, turned on the baby monitor and then the rest of us headed outside to play in that white fluffy stuff (well actually it hard right now, from being packed from the wind we have had the last week!).  


I was trying to think of something fun for the kids to do outside and then it came to me, we will snow paint!  Yeppers it was something new for all of them and they though it was amazing to change the color of snow.  With a little searching around my home I was able to find 3 empty spray bottles.  I rinsed them out, filled them with water and added some food coloring. And there ya go, snow paint!


We also dug snow "seats" as the kids were calling them, and yes I did have to sit in them too (for you knowledge, I do not have ski pants!!).  We went tobogganing and just ran around the yard, climbed as many hills as we could find and crawled in the snow.  No I did not crawl in the snow, sitting in their seats was more then enough for me.  Once we got inside after about a good 2 hours outside, I made them some hot chocolate and they watched a little bit of TV while I got some lunch going for them.  After playing so hard outside I thought maybe they would sleep today at quiet time, but with no luck only 1 out of 4 slept.  So we decided to start coloring pictures instead.  All in all, I sure hope we continue to have this nice weather so we can keep playing outside!


Happy Valentine's Day

So we wrapped up our Valentines' week with a fun filled day (yesterday).  These kids wore me out so much, I was just to tired to blog about our activities last night!


The first batch of sugar cookies I made just didn't turn out at all, the dough was way to crumbly and I couldn't roll it out to cut our heart shapes.  So first in the morning the 2 kids and I made our dough and put it in the fridge to set.  While the dough was setting we did a few crafts.  First was the Butterfly pencil toppers and then the stained glass hearts made of crayons. The kids were totally amazed at how the hearts turned out after ironing them and watching them melt.  It was a fun time that's for sure.  We then followed our craft session with finishing off the cookies.  I rolled some dough out gave the children heart shaped cookie cutters and let them go to town.  Once there was no room left for more hearts I placed those ones on cookie sheets to bake and then redid the mentioned steps again.  I am pretty sure I rolled that dough out a good 7 times, and finally I thought that's enough for now.  We cleaned up and the kids watched some Valentine's shows on TV and played for a while, while I whipped out a quick lunch for them.  I decided for Valentines' Day we would have heart shaped sandwiches and yet again it was a big hit, as they were something a little different then a normal square sandwich.  We rounded off lunch time with a Valentines' Story and then quiet time, to my amazement both kids fell asleep too, I must have wore them out.  After our quiet time they got to ice the sugar cookies and have a few for their PM Snack. 


I must say it was a busy day but we all had a blast!  


Our book we read was 
Clifford's Valentine's Day by Norman Bridwell


Sunday, February 13, 2011

Food Menu for Feb 14 to Feb 18

Monday
AM Snack: apples and milk
Lunch: heart sandwiches with peanut butter and jam, carrots, and yogurt, fruit juice
PM Snack: hand decorated sugar cookies (the kids get to decorate their own!), milk

Tuesday
AM Snack: grapes and milk
Lunch: Biscuit Pizza and juice
PM Snack: granola bars and milk

Wednesday: Ducky's is closed

Thursday
AM Snack: oranges and milk
Lunch: Sloppy Joe's and salad with juice
PM Snack: Banana bread and milk

Friday
AM Snack: strawberries and milk
Lunch: Spaghetti and bread with juice
PM Snack: chocolate chip cookies and milk

Friday, February 11, 2011

Valentine's Prep Week

So this week I set aside the letter idea (I will get back on track with the kids next week) and decided that we were going to work on Valentine's Day crafts.  Seem how its been to freaking cold to take the little ones outside most of the week, we had a lot of time to do some fun crafts. 
Work in progress

XOXO ~ I was at the local Dollar Store in Regina (guess that wouldn't be local if its not near me?!?!), anyways, I found these cute wooden XOXO's.  I thought it would be fun for the kids to paint and add a little glitter to, for a decoration to keep for the Love Day. This craft wasn't taken from any website or book, I just seen them and thought it was a good idea!

Finished Product


Heart Flowers in a Pot ~ craft found on DTLK
The two girls had a blast making these pretty little heart flowers for their parents.  There is a quote on the red heart that says "Thumbody loves you, its me!"  We used this quote cause the red dots on our heart flowers were made with their thumb prints.


Work in progress
Puppy outta our hearts ~ craft from DTLK
We made what kinda look like puppy dogs from hearts only.  I guess when you have a 3 and 4 year old doing the crafts you kinda have to use your imagination sometimes.  I still think they did a great job.  The instructions said to use construction paper, but once again at the Dollar Store I found foam hearts in a few different sizes, so I thought it would be fun to use them instead of paper.
Finished Puppy


Butterflies ~  craft from Kaboose

What little gal doesn't like butterfly's???? When I was looking for crafts to do this week, my daughter was sitting at the table coloring beside me, she saw this one and we just had to do it. 

"Valentine, you make my heart Flutter!"  is the quote that is written on the wings of the butterfly.  The wings are also made out of two hearts.  Its kinda hard to tell from the picture, but that's what they are!


We also did some coloring pages.  I found a number of cute ones on Google image search for Valentine's Day coloring pages


I have a few other projects planned for Monday, for our Valentine's Party too.  I thought I would post them ahead of time for those whom might want to try them with their children too.


Stain Glass Hearts ~ Craft from Kaboose
Caution, I don't know if you would want to try this craft with toddlers???? Using heat might be a scary thing for children just learning right from wrong.


Butterfly Pencils ~ Craft from Piggy Giggles


And I am hoping to make some sugar cookies on Sunday afternoon.  I will then let the kids ice them with pink and red icing and decorations.  This will be their afternoon snack. 


Sugar Cookies
Ingredients:
Cookies
 • 1/3 cup butter or margarine, softened
 • 1/3 cup shortening (or margarine)
 • 3/4 cup sugar
 • 1 teaspoon baking powder
 • pinch salt
 • 1 egg
 • 1 teaspoon vanilla
 • 2 cups all-purpose flour
 • granulated sugar, colored if desired
Sugar Cookie Icing
 • 1 cup confectioners' sugar
 • 2 teaspoons milk
 • 2 teaspoons light corn syrup
 • 1/4 teaspoon almond extract
 • 3 drops red food coloring
Directions:
Cookies
 1.  Beat butter and shortening thoroughly with an electric mixer or pastry cutter.
 2.  Add sugar, baking powder and a pinch of salt and mix until well combined.
 3.  Beat in egg and vanilla then as much flour as you can with the electric mixer.
 4.  Stir in the remaining flour.
 5.  Cover and chill for at least 1 hour;
 6.  Preheat oven to 375 degrees F
 7.  Split the dough in 1/2 and roll one half at a time. Cut out with appropriately shaped cookie cutters.
 8.  Keep the piece you aren't using in the fridge.
 9.  Bake on ungreased cookie sheets for about 7 to 8 minutes, until edges are firm and bottoms are lightly
     browned (don't over cook).
 10. Makes 36 cookies.
Icing
 11. In a small bowl, stir together the confectioners' sugar and milk until smooth. Add the corn syrup and
     almond extract; mix well. If icing is too thick, add more corn syrup.
 12. Divide into separate bowls, and add food colorings to desired intensity. Dip cookies or paint them with
     a brush.

Friday, February 4, 2011

A is for....

The letter Aa.....

While a number of the children in my care are fairly young, I find it nice to still start teaching them the alphabet.  Sure they might not have a clue what I am talking about, it helps them with crafts, memory, and fine motor skills.  I print out the letter for the week so they can trace them on the lined sheet, just like the big kids in kindergarten do!  My daughter loves this cause she gets to do what her big brother is doing at school, but only doing it at home with mommy.  I planned a few snacks around the letter Aa, and also made sandwiches into the shape of an A too.  Now I am a little slow in times and totally forgot to take pictures of our activities this week. I promise I will try harder with our activities to come.

Here's what we did for the week:
  • Coloured and cut out Alligators and glued them on to colored paper
Craft can be found at: Alligator by DTLK


  • Made Apple pie (wow that's a task with a 2 1/2 year old and a 4 year old!)
See below for our wonderful recipe


  • Coloured Apple pictures
Coloring page can be found at: Apple Colouring Page  by DTLK


  • Traced the letter Aa
Tracing page can be found at: Learning to print Aa by Kids Learning Station


  • Cut out and pasted some words that start with Aa and the letter Aa by itself
Aa is for: apple, airplane, ant, Alanna, Aliyah, Ashley, Apple Pie, alligator

  • Made applesauce for a snack
See recipe below.


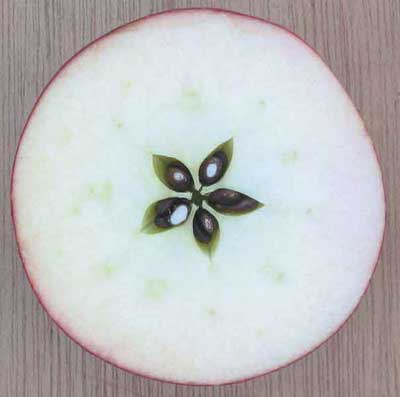
  • Cut apples in half to show the kids that the seeds make a star in the inside (then of course we ate them as a snack afterwards!)
Tip: cut apple through the middle horizontal not vertical


Apple Pie Recipe:


Basic Pie Dough Recipe

Makes one double crust pie or 2 single crust pies.
Ingredients:
2 cups flour
1 teaspoon salt
2/3 cup shortening or lard
2 tablespoons cold butter
4-7 tablespoons cold water

Directions: 

Sift the flour with the salt. Cut in the shortening until the mixture looks like small peas. Cut in the butter coarsely. The addition of the butter makes a flaky pastry crust. Sprinkle this mixture with water a tablespoon at a time and mix lightly with a fork. Keep adding water 1 tablespoon at a time, just until dough will come together when you mix it with the fork.Gather the dough into a ball. Dough can be refrigerated until ready to use at this stage. If using now, divide the pastry into 2 sections, one just slightly larger than the other. Take the larger ball of dough and roll it out into a large, thin circle with a rolling pin. Make sure you sprinkle a bit of flour on the surface you are rolling the dough out on before you begin. Use the larger sheet of dough as the bottom crust of a 2 crust pie. Roll out the other piece for the top.

Follow directions on the pie recipe for how to bake the pie.

Apple Pie Filling Recipe


Ingredients:

5 to 6 cups apples, peeled and thinly sliced
1/2 to 3/4 cup sugar (to your taste and depends on the sweetness of the apples)
3 tablespoons flour
1 teaspoon cinnamon
dash salt
2 tablespoons cold butter

Directions:


Preheat the oven to 425ºF.
Lay 1/2 the pastry, rolled out to about 1/8" thickness, in the bottom of the pie pan and press it in gently to lay flat in the pan. Leave the excess crust hanging over the edges for now.
Place peeled, sliced apples in a bowl. Mix together the sugar, flour, salt and cinnamon. Pour over sliced apples and mix. Fill the pie pan with the apples and pat down with a spoon. Dot the filling with pieces of butter. Moisten the lip of the pie pan with water. Place the top layer of rolled out crust over the filling, making sure crust reaches outer edges of the pie pan all around. Seal the edge and flute all around (see notes below for how to flute a pie edge). Take a fork and prick the pie top in several places to create vents for steam to escape. Bake for 50 minutes, until pastry is golden and the filling is bubbling through the vents.
Let cool a bit before cutting to allow the filling to settle

 Apple Sauce Recipe ~ By AllRecipes.com

Ingredients

  • 4 apples - peeled, cored and chopped
  • 3/4 cup water
  • 1/4 cup white sugar
  • 1/2 teaspoon ground cinnamon

Directions

  1. In a saucepan, combine apples, water, sugar, and cinnamon. Cover, and cook over medium heat for 15 to 20 minutes, or until apples are soft. Allow to cool, then mash with a fork or potato masher. 
A nice simple recipe for kids to help with, doesn't take a lot of time and you can even add berries or other fruit to the apple mixture while cooking for a great change in flavor!