Sunday, May 29, 2011

Rain, rain go away...

Rain, Rain go away... come back another day.  Or as for our signing on Friday: Rain, Rain go away... come back NEVER!  We are all tired of the rain and water around our area right now.  We can't seem to get anything done outside that needs to be done.  Whether it be cleaning up the yard (aka dandelions), plating a garden (if its not under water), the farmers getting out into the field to seed their crops, or the main thing all kids want..... go outside to play.  Every time it is just about dry to an extent, it seems to rain again!  So, Friday like usual it was RAINING outside and while I was tiding up our morning snack I hear the two girls in the living room signing the "Rain, Rain go away... Come back never".  I thought it was pretty cute when they are only 3 and 4 years old.  They are just itching to get outside and burn off some of this extra energy they seem to have.  And I know all the mom's and dad's around here are kinda wanting the same thing, these children have been couped up inside all winter and now its getting on the the beginning of June and they still seemed to be stuck inside most days. 

So, now my task was how to entertain these little gaffers on this rainy day.  Well what better thing to do then bake!!! Yeppers, I thought it was a great idea too.  So I ask the little ladies what kinda cookies they wanted to baked today and what do you think they said?!?! Ya I should have known that answer before I asked too.... chocolate chip cookies of course.  So that's what we did for the rest of the morning was bake 10 dozen chocolate chip cookies. Now I am guessing that it was probably suppose to be 12 dozen but by the time you take into count the amount of flour that ended up on the counter instead of the mixing bowl and um those little fingers always seemed to be in the mixing bowl and then the mouth.... I am guessing that's were my other 2 dozen cookies ended up?!?!

As for the cooked ones... they didn't seem to last all that long either.  The kids wanted them for lunch, afternoon snack, dessert, and of course I sent some home with the kids too.  We have to have send enough for every brother and or sister and usually mom and dad too.  So it is now Sunday night here and I have 5 cookies left..... I guess we might have to make some more this week!


Please feel free to check out additional picture at Duckys Photos

Wednesday, May 4, 2011

Who needs Power?

So this past weekend we ended up with one nasty storm come through our area of the province.  It consisted on extremely high winds, started with rain and continued onto SNOW and way to much of it.  Along with all this joyful weather came a power outage due to knocked down power polls.  This wasn't just a short lived outage either, for the area we lived in it was a dreadful 63 hours.  Ya, that's right 63 hours without power, heat, and water (here in small towns if you don't have power you don't water seems how the pumps can't run).  So lets just say it was a really long weekend for the kids and I, as the husband was stranded in the city due to the weather here (of course he had power, water, and heat.  There was no sight of the storm there besides some extra wind). 

So as the first day moved on and there was no sight of power coming back on anytime soon, I had to try and figure out how to keep my kids warm and entertained at the same time.  Now that's one large task as kids now a days don't know how to live without that power.  NO.... t.v., video games, music, computer, etc.  And of course we couldn't go down to the play room in our basement to play because along with the fun weather and power outage meant we had a soaking wet basement cause out sump pumps were unable to run. 

So mommy (me) was on a mission to entertain this little ones as much as I could.  We did everything from reading about a million books to coloring about 10 million pictures (OK I know that was extreme numbers but after the first 8 hours of doing it, one really does get tired of it, no matter how much you enjoy them).  So as i lay there while we have quiet time, I was trying to figure out what w should once they all wake up again.  Here is what the following day and a half consisted of:

  • Many rounds of hide and go seek
  • Building a large fort out of blankets and pillows
  • Playing catch the bad guy and put them in jail (of course our jail was under the blanket, so one could stay warm)
  • Ring around the Rosie
  • Duck duck goose (not to easy to play with only 3 people!)
  • Building towers out of Lego
  • Practicing our printing and sight words (my oldest is in grade 1)
  •  Watching the vehicle get stuck at the corner of our street, we even had a large semi get stuck, the kids thought that was crazy, how a big vehicle like that could get stuck
  • Of course more coloring and reading happened too!
As for food, it was so hard to have my daughter understand that we can't "cook" Kraft Dinner because you need power to run the stove.  So we all lived on sandwiches, carrots, pudding and granola bars for the time our power was out.  We did luck out and the husband brought home a pizza from the city for us.  No it wasn't hot by the time he got home, but it did taste yummy after eating sandwiches for breakfast, lunch and supper the day before and the first part of the following day!

None the less, it might have been a long cold weekend for us.  We were able to learn and teach the kids, on should never take for granted what we have cause many people in this world have to live the way we did for those 63 hours all the time.  It was a joy to have so much fun with the kids, but we were glad to have power back on in the end. 


How to play Ring around the Rosie

What you need: All you need for this game is a group of children. This game can be played both indoors and outdoors.

How to play:
The children join hands in a circle and walk around the circle singing, "Ring around the Rosie, a pocket full of posies, ashes, ashes, we all fall down." When the word "down" is sung, children must stop walking and sit down.

The rules:
Don't sit down until the end of the song.

How to win:
The last person standing is out of the game, and the game continues until one person remains.

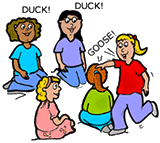
How to play Duck, Duck, Goose

Objective:The objective of Duck Duck Goose is for the person who is the ‘Picker’ to take the place of a player sitting in the circle.

Game Layout:Players sit in a circle facing inwards while one player, the picker, walks around the circle and touches each of the sitting players in turn, calling them either a ‘Duck’ or a ‘Goose’.

Game Description:Then the Goose is named, the Goose must get up and chase the Picker back to where they were seated. If the Picker gets to the spot and sits down before the Goose can catch them, then the Goose becomes the new Picker and the game continues. If the Goose manages to tag the Picker before the Picker can sit down, then the Goose may sit down again and the Picker resumes walking around the circle declaring Ducks and Geese.

Rules:The Goose must get up and chase the Picker. In a normal game the Picker and the Goose must run in the same direction around the circle.

Many variations of Duck Duck Goose can be played. For example, ‘Duck’Duck Grey Duck’ is a variation where the Grey Duck replaces the Goose, and other Ducks are described by an adjective, eg
Rag Tag is a very similar game, but instead of calling out Ducks and Geese, the Picker drops a rag or cloth behind one child, who must pick it up and try to Tag the picker. Duck Duck Goose can be played in numerous variations by replacing the words, eg Ninja Ninja Pirate, Elf Elf Santa etc. This can be done to suit a theme at parties and other events.

Strategy, Skills and Tactics

The key to Duck Duck Goose is being alert and getting up quickly after being called the Goose, and running quickly. If playing the variation Duck Duck Grey Duck, then the adjectives can be used to trick the other players into thinking that you are calling Grey duck, eg ‘Gr…oovy Duck’, which will slow down their reaction time. In Duck Duck Animal, choosing the animal carefully can also give the Picker an advantage. Choosing an awkward movement style when picking a fast runner can be an advantage.

Monday, April 25, 2011

The Easter Bunny Came Early!

What a joy it is to what the children have so much fun with crafts, decorating, and "hunting".  Here at Ducky's we had our Easter party this past Thursday and lets say I was sure tired by the end of the day, although the children were not because they were all on a sugar high from cupcakes!


It has been pretty quiet around the day care for the last few weeks with mom's or dad's being off of work for a while and with me hurting my back and having to cancel child care for a week to recuperate.  But along came Wednesday and I finally had an extra little one for us to do some Easter crafts with.

Wednesday we made Bunny hats, Easter Lily's made out of our hand prints. We also had some baking fun by make chicken nests with eggs and the famous "Peeps".  The girls had a blast with this project and just as much fun eating them afterwards.

Thursday was a busier day with having my regulars come in for our party.  We started off with making chicks out of tennis balls, followed by decorating paper eggs for our mom's and dad's.  While the children were having fun decorating their eggs I snuk off to the living room to hide some plastic goodie filled eggs.  I then told the children that I had seen the Easter Bunny outside and he told me he had snuk into the house early because he heard we were having our party today.  Wow, you should have seen the children's faces when I told them this.  It was priceless and I wish I had the camera out at that time.  So I continued on with what the Easter bunny told me....... he laid eggs around the living room and they were to collect them all in the baskets he left, once all were found, they had to sit in a circle and listen to me.  So that's what the children did and the noise begun!!  Every egg that was found I would here a "WOW" or "I have another one", "Look, look, it green, blue, orange..." .  We found them all and sat in a circle, they all got to pick the color they wanted and then we continued on by practicing our colors and sorting.  Them we counted everyones eggs to make sure they all had the same amount.  Now was the fun part.... they got to open the egg and see what the Easter bunny left them.  The girls got barrettes, chocolate eggs, stickers,  light up little ducks for the bath tub.  And the boys got a hot wheels car, stickers, candy eggs and a light up little frog for the bath tub.

By the time our egg hunt was over it was 5 minutes to 12 and lunch wasn't started...... So I asked the children what the Easter Bunny's favourite food was and once they figured it out they then learned that that was part of our lunch too.  They though it was funny that the Easter likes carrots and so do they!  That's all they talked about for the rest of lunch time.  We ended lunch off with some homemade chick cupcakes that I made early in the morning before the children even arrived. And then it was nap time, or I thought!  Only one child ended up falling asleep, the rest were on a sugar high from the cupcakes (let's just say I have learned to give them cupcakes after nap time from now on!).  We finished our day off with playing rabbits and coloring a few Easter pictures.  At home time each child got a little Easter from me and they got to take them home to find out what was in them.  Because I will admit it, I was just to tired to keep everyone's things separate from one another and didn't want to keep taking the candy away from the kids, because they weren't allowed to eat it before supper.  So that was left up to mom and dad to deal with!!! Sorry mom's and dad's but "Ducky" was exhausted!

Remember to take take a "hop" over to Ducky's Photos to see more of our fun filled day's

Tuesday, April 19, 2011

Positive and Playful Parenting

OK, so I have been receiving some great "share it forward" e-mails from one of the community child educator programs that is around good old Saskatchewan.  I keep meaning to post them and "share them forward" for all of you too but it just keeps getting set to the side..... So finally here is one.  I find alot of theses quick messages to have some great tips and even ideas on what to do with your children and family often.


Positive Parenting is simple steps that can make parenting fun and easy.

Everyone no matter the age learns and grows better in a positive environment.  If you praise instead of criticizing there will be no resentment. Think about how you would feel if your boss continually pointed out all your mistakes and never praised you. Criticism breeds resentment, causes others to justify their behavior, wounds the others sense of importance, and destroys the person’s sense of pride, even children. 

Think about the flip side, when your boss praises you how to you feel?

Praise your child for what they do well not what they didn’t do right. This will leave your child feeling happy. Children like everyone else, likes to feel valued. Children will continue the praised behaviour. Use positive parenting to raise your child in the best environment possible.

§ Praise and encourage appropriate behaviour.
§ Show affection for your child.
§ Recognize her accomplishments

Children learn best through play.
Playful parenting understands the importance of play in a child’s life. Playful parenting is an effective way to learn more about what your child is really feeling. Children tend to open up when things are more relaxed and things are easy going. Positive interactions are more likely to leave a lasting impression of trust and belief in you as a parent. Remember that you’re always building a relationship, if you use positive parenting, this will keep the pathways to communication open. If your child trusts and is comfortable, your child will always come to you when there is a problem and it will be easier for you to engage your child in conversation.

Interactions between parents and children are important for laying the foundations for the child’s social and emotional development. Becoming a playful parent will provide the right emotional setting for you and your child to bond with each other gracefully. Playing can be a way to identify with your child. Think about how you felt when your parents played a game with you? Did this leave a lasting impression for you? How did you feel towards you parents, more open, more positive, and more relaxed? Remember this when you play with your child. You are not only bonding but creating lasting memories.
Do fun things together as a family, such as:
§ Playing games
§ Reading
§ Going to community events

* thank you to the team that puts Share it Forward together!

Monday, April 18, 2011

Lets get Sneaky with VEGGIES and FRUIT

Okay, I will be the first to admit it... I'm one of those mommy's who tries to sneak extra fruit 
and veggies into my kids any way I can! My middle child is one of the pickiest eaters around, 
and if its not Kraft Dinner and hot dogs, she doesn't want it (will for the most part).  So I have
been doing alot of searching on how to get some vegetables into to her and my other children with 
out a big fight. 
  
Here are some great ideas I have been trying that seem to work and a few that I will be trying
to get my children and the ones in my care to eat more veggies and fruit.

 
We all know by now that we should be eating five to ten servings of fruits and vegetables each day 
according to Canada's Food Guide. But knowing and doing are two different things, aren’t they?
Sometimes it is just not easy to get them all in there. We are constantly tempted to fill up on convenience
and junk food. If your family is anything like mine, they’d much rather fill up on crackers or a bowl of 
pasta instead of trying a plate of steamed broccoli.    
 
Start the day with a breakfast smoothie. All you have to do is throw some fruits, low-fat yogurt and 
ice in a blender. You may also want to add a scoop of protein powder in there for good measure. 
Just blend for a few seconds and you have the perfect breakfast ready to go. To make it even more 
appealing for your kids, use some frozen yogurt or a scoop of ice cream in the smoothie. They won’t 
believe that you are letting them have ice cream for breakfast. To make this even more fulfilling for you 
to know they are getting all the vitamins they need, toss some spinage in there too.  I don't know to 
many children that will eat half a cup of raw spinage or even cooked but when putting it into a smoothy 
it doesn't change the taste of the drink (it will make it bright Green though) but gives you all the great 
nutrients you want you family to have.
 
Dried fruit makes an excellent snack any time of the day. Add some small cartons of raisins to
your child’s lunch box, pack some yogurt-covered raisins in your hubby's briefcase and keep some trail
mix sitting around for snacking. You can also add dried fruit to oatmeal and cereal in the morning. 
 
Add some fruits and vegetables to your family’s sandwiches. You can add some banana, sliced 
apples or strawberry slices to a peanut butter sandwich. Top a turkey sandwich with lettuce, tomato, 
cucumber and anything else they will eat. You can even make a sub shop style vegetable sandwich by 
combining several different vegetables with some mayonnaise and cheese on bread. 
 
Have a salad bar at dinner. Set out a variety of chopped vegetables, some cheese and croutons
as well as several choices of salad dressing along with the lettuce and let everybody create their 
own perfect salad. 
 
Let them drink their fruits and vegetables. Keep an assortment of fruit and vegetable juices in the
fridge and encourage everyone to drink them as a snack. Get creative. You could start “family cocktail
hour” by pouring everybody a glass of his or her favorite juice over ice. Add some straws, cocktail 
umbrellas and sit together to talk about how everybody’s day went. 
 
Try this for dessert. Put a small scoop of ice cream or frozen yogurt in a bowl and top it with lots 
of fresh or frozen fruit. 
 
Offer fruits and vegetables as snacks. You can cut apples into slices and top them with peanut butter 
or cheese. Cube cheese and serve with grapes. Cut up some fresh veggies and serve them with ranch 
dip. And of course there’s ants on a log. Spread some cream cheese, cheez whiz, or peanut butter on 
the inside of a stick of celery and sprinkle raisins on it (wow, fruit and vegetable in one snack). 
 
Try some new fruits and vegetables. Pick something exotic to get your family’s curiosity. With a little 
luck their curiosity will outweigh their initial apprehension to trying something new. You could try 
artichokes, plantains, papaya, mango, star fruit, or anything else you can find in the produce department 
of your local store. 
 
Start “My Veggie Day”. Each family member gets to pick a vegetable one day of the week. They 
qualify to pick a vegetable as long as they tried each vegetable the week before, otherwise they loose 
a turn and Mom gets to pick. 
 
Incorporate a few of these ideas and you will have everyone in your family eating more fruits and 
vegetables in no time. 
 
Here is another couple of tips:  Now that everyone in the family has gotten a taste for it, make sure 
you always have plenty of fresh fruits and veggies available and ready to snack on. When you buy your 
groceries and wash your fruit and veggies take some extra time and cut them up right away.  This way
they are ready to offer at the moment your little one says “I'm hungry...” or the instant they walk in the 
door from school.  This way its easy for both you and your children to grab them and hand them out
 instead of waiting till the cut up for them. You can even go one step further and place them in snack 
size baggies right after you cut them up.  This way your family can help them self's and it often makes 
younger children feel good about themselves that they can grab something with out having to ask and 
you once again get the satisfaction of knowing its healthy for them!



Thursday, April 7, 2011

Sleep Routines

Are you having issues with getting your child to sleep?  Don't think you are alone!  Many, many parents have these same issues and problems.  Most can find a routine to work for their child(ren) but some times it can take many days or weeks for your child(ren) to learn what he or she should be doing.  Here are some tips that I thought I would pass along that I received from an e-mail through one of the health care programs in our area.  I hope maybe some of these tips can help you if you are having trouble getting your little ones clam and ready for bed.
 
 Bedtime routines are not limited to after dinner, preparing your child for bedtime starts when they first wake up.

Wake up Routine: If you want your children to have an early bedtime around 7pm, then they need to be up before 8am. If they sleep in, their nap will be later and therefore bedtime will be later. Try to wake them up at the same time each morning.

Physical Activity: Children who are physically active fall asleep easier. Therefore it’s important that your child is physically active throughout the day.

Naps: For most children, if they miss their nap there is a danger that they will be over tired and find it hard to settle at night. If they sleep too long or too late in the afternoon, after 3pm, they will not feel sleepy at bedtime.
Bedtime Routine: Incorporate a routine after dinner leading up to bedtime. This will signal to your children that bedtime is approaching and that when the routines are completed; it’s expected for them to go to sleep. If you keep the same routines at the same times, your children will know what will happen next and when it’s time to sleep. A routine provides your children with stability. A common bedtime routine might be a bath, snack, story, brush teeth and a bedtime snuggle.

Remember as you get closer to bedtime, keep activities quiet and calm. Minimize after-dinner television because this may stimulate a child.

When getting your children ready for bed, dim the lights, dress them in cozy sleepers and blankets and try snuggling. This encourages relaxation and will create drowsiness. Always try to create an environment that will induce sleep. Soft music may also help.

If your child does not want to go to bed: Try waiting in your child’s room until they fall asleep. As you keep a consistent day and bedtime routine, you will find the wait time for them to fall asleep will shorten. Don’t make eye contact while you are in the room, and be as boring as possible. Wait until your child is calm, and then move away. If he gets upset come back and reassure him by touching him but not by making eye contact. As he becomes more settled move further and further away.

Night time restlessness: Settle your child back to sleep if they wake during the night by comforting them. Touch them but don’t speak or make eye contact. Just comfort them until they go back to sleep or are settled enough for you too leave.

Thursday, March 17, 2011

The luck of an Irish


Well we had our little party for the big green day and what a blast we had doing all sorts of fun little things through out the day.

We made our own Happy St. Patrick's Day pictures on green paper, with stickers and drawings.

Shamrock Hats

What you need:

  • green paper
  • scissors
  • stickers
  • stapler
  • pipe cleaners


How to make these fancy hats:

  • Cut 2 shamrocks for each child out of green paper
  • Cut a strips of green paper long enough to wrap around your child's head (you might have to tape two pieces together to make it big enough)
  • Let the children decorate the head band strips
  • Once decorated, wrap the paper around the child's head to make sure its the right size and then staple together.
  • Staple a pipe cleaner to the back of each shamrock
  • Staple the other end of the pipe cleaner the the head band paper
  • Once finished you might want to place a piece of tape over the staples so that they don't get caught in the children's hair, or make sure when you staple that the loops of the staple are to the outside of the head.
Each child received a green beaded neck lace today also to wear with their new hats.

While I was making lunch I found some St. Patrick's Day shows on YouTube for the children to watch (as I don't have any of my own!)


For lunch we had some fun also......
I cut their sandwiches in to shamrock shapes
We had cucumbers (cause they are green!)
Our juice was the "pot of gold" as is was a citrus punch
Dessert was vanilla pudding that I died green with food coloring (the kids thought this was just amazing!)


During Lunch time we listened to some Irish and St. Patrick's Day music. 


Our afternoon snack they children got to have fun decorating sugar cookies with green icing and shamrock sprinkles.


While the children had their nap/quiet time, I painted small clay pots so they were black.  Once dried I placed gold chocolate coins in them.  And they can take their pot of gold home for a treat for later (we all know, I have given the kids enough sugar with the cookies and icing, there is no way they get chocolate here too.  Mom and Dad can deal with that sugar high!)


Check out additional pictures at Ducky's Photos

Leading up to St. Patrick's Day

We Start off our St Patrick's Day crafts at the end of last week.  I was short on kids so I didn't want to move into the next farm animal yet so.... what better to do then more fun crafts!

Here are some of the crafts that lead us up to the big Irish Day.


We colored numerous St. Patty Day pictures:


Page can be found at Parenting Leehansen.com


Page can be found at Craft Elf


Page can be found at dulemba.blogspot.com


Tie-died Coffee Filter Shamrocks

This craft came from Kaboose website, I just changed a few things to make it easier for the younger ones.

What you need:
  • coffee filters
  • green markers
  • Q-tips
  • Small dish of water
  • scissors
How to make your tie-die Shamrocks:

  1. Have the children color all over the coffee filter with the green makers. (Don't worry about designs or anything fancy, just let them scribble for once!)
  2. After they have colored the filters dip your Q-tip in the water
  3. Then on to the colored filters
  4. Now watch the magic happen...... the water makes the coloring run and forms fancy designs of its own
  5. Set filters to the side to dry
  6. Once dry cut the filters into the shape of shamrocks and hang up for decorations!

Treasure Boxes

I found some cute little wooden boxes at the Dollar store and thought that they would make great little treasure chests for the children.

What you need:

  • Small boxes (doesn't have to be wooden ones they could be cardboard too)
  • Green paint
  • Paint Brushes
  • Gems (we used little jewels, that I found at the Dollar Store)
  • Glue

Instead of gems/jewels you could use:
  • buttons
  • beads
  • stickers
  • little rocks

How we made our treasure chests:

  1. Paint the boxes green
  2. Let dry
  3. Glue the little gems on to the box
  4. Let dry
  5. Now your little ones have their very own special box to keep whatever they like to in it

A Treasure Hunt

While the children were painting there Treasure Boxes, I headed to the living room for a bit and started hiding some St Patrick's Day goodies.  Also at the Dollar Store, I found some green coins and shinny shamrocks... I picked them up just because I knew the children would love them.  So I thought for a while on what we could do with these fun little items.  That's when I came up with the idea for the treasure hunt to go along with our sparkly boxes.  With having younger children, I decided not to hide our treasure in any place all to hard for them to find.  They were all located in plain sight for them to find, yet they still had to look for them.  Once they found them they were able to put their treasures in their own boxes to keep and take home.


Remember to check out Ducky's Photos for more amazing pictures of the children having fun.

Tuesday, March 8, 2011

A rainbow and snack

Our St. Patrick's Day craft started today with a snack and craft in one.

We made rainbows out of Fruit Loops and Cheerios. First I had the children sort the Fruit Loops by color and of course they were eating just as many as they were putting in the dishes!  This was great because we were able to do a number of activities and learning experiences at once. 
  • Snack
  • Learning colors (for those that don't know their colors yet)
  • Sorting/math skills
While the children finished sorting the colored Fruit Loops, I was making the outline of the rainbow.  I wasn't able to find one that I liked from the Internet so I decided to do it myself.  I imagine if I took some more time I would have found one, but instead I just drew two clouds at the bottom of each paper and connected them with one big loop for the starting of the rainbow.


What you need:

  • Heavy paper (card stock) in the colour you choose
  • Glue
  • Fruit Loops
  • Cheerios
  • Template of a rainbow


Directions:

  1. Have the children place glue along the top row of the rainbow and place the red fruit loops long it
  2. Continue the first step until you reach the final color (each row will get smaller and smaller)
  3. Place glue inside the cloud and use the cheerios for this


Colors of the Rainbow in order:

  1. Red
  2. Orange
  3. Yellow
  4. Green
  5. Blue
  6. Indigo
  7. Violet (Purple)

Of course we skipped the indigo cause Fruit Loops don't come in that color!!!!


Other ideas: 

Instead of fruit loops you could use
  • beads
  • buttons
  • tissue paper
  • colored pasta
  • colored rice

Instead of the cheerios you could use
  • cotton balls
  • white tissue paper
  • rice
  • pasta
  • white buttons
  • white beads
Remember to check out Ducky's Photos for more pictures of today's craft

Friday, March 4, 2011

Lion or Lamb

So the old saying goes.....
IF MARCH COMES IN LIKE A LION IT GOES OUT LIKE A LAMB

Well I sure hope this stands true, the kids and I are tired of winter already.  We have hardly been able to go outside, between the ugly weather and all the colds we seem to be passing around.

March 1st surely came in like a lion here is Saskatchewan, with a temperature of -39 Celsius with the windchill.  So none the less we stayed inside again and did some crafts for this fun little saying.  Now lets hope it starts to change over the the lamb real soon, so we can go outside for a while during the day.

We made LAMBS and LIONS.


What you need:
cotton balls
scrap paper (pink, black, orange, brown, yellow)
Black marker
paper plates
glue
scissors
brown or black pipe cleaners
googly eyes


What you do:
LION
  1. Cut the yellow, brown, and orange paper in the small strips about 2" to 3" in length
  2. glue strips of colour paper around the outside edge of one of the paper plates
  3. add folded pipe cleaners to the sides of the face for whiskers
  4. add eyes and a black triangle to the middle for a nose
  5. We then added a mouth with a black marker and a few dots for details for the whiskers


LAMB

  1. glue cotton balls around the outside edge of a paper plate
  2. add googly eyes and a pink triangle to the center of the plate for a nose
  3. we then drew on a mouth with a black marker
  4. if you have extra paper laying around you can make a bow and glue it on to the top of the lambs head too, if you would like.


A fun easy project to do with children.  And each day they can look outside and change the face of the animal to how the weather is.  So if its cold and ugly out, its a lion day and if its nice and warm its a lamb day.


Thursday, March 3, 2011

Chicken Week Days 2 and 3

Sorry I didn't get yesterday craft posted, I ran out of time before my day came to an end!  So I will make both yesterdays and today's in one post. 

So we have done a few more crafts along with reading some chicken/duck stories and coloring another picture.

For the next stage in the chickens life we colored:


Chickens in a nest can be found at www.coloring.ws

As for crafts we made chicks that hatch and form chicken pictures.

Chicks that Hatch

What you need:

Plastic Eggs (you can usually find these around Easter time in stores, they open up and you can fill them with candy or little gifts)
Large yellow pom poms (two for each child)
googly eyes
orange foam or construction paper
white glue

What to do:
  1. Place a decent amount of white glue in the bottom portion of the egg
  2. Stick a yellow pom pom into it
  3. Then glue the second pom pom on top of the first one
  4. Glue your eyes and beak on to the top pom pom 
Once they are dry you can then show the children how the egg hatches!!  My little ones had fun showing me how they can hatch their eggs all by themselves.

Foam Chickens

What you need:
Yellow foam
Red Foam
Orange Foam
Googly Eyes
Glue
Scissors
pencil

What you do:
  1. Draw the shape of a large egg for the body of yellow foam
  2. Draw the shape of two wings on yellow foam
  3. Draw feet and beaks on the orange foam
  4. Draw the head piece of a chicken on the red foam
  5. Let the children cut the shapes out (if they aren't old enough to cut you might have to do this part too!)
  6. Glue pieces together to make the chicken 
  7. Add eyes 
Reading:

I had the older children look through the book shelf to see if they could pick out the chicken books.
Here's what they came back with.... (I know they are not about chickens but they were pretty darn close, so we read them anyways). 

Book 1:
The Ugly Duckling
From the Series "Baby Bear's Read Along"


Book 2:
Duck Duck Moose
Written by Dave Horowitz


I tried to explain to the children the difference between ducks and chickens, now I am not to sure if the younger one know the difference yet or not......  But I am still happy they found "bird" books by themselves.


Take a look at additional pictures at: Ducky's Photos

Monday, February 28, 2011

Chicken Week Day 1

So with the older kids back into school this week, the younger ones and I at Ducky's have started our new themed weeks.  As mentioned in a previous post, I was finding the Lettered weeks to be a little hard for some of the children, they are mostly between 2 and 3 years of age. I decided to start with farm animals and see how it will go from there.

Today we did the following:

While I was getting out craft project ready I had the children colour 2 pictures.
1: just an egg ( Egg found at Family Crafts on About.com)


2: a picture of a chick that has just hatched (chick in egg can be found on DTLK's chick colouring pages)


These pages will be kept and at the end of the week with will make a little booklet of the stages of growth for a chicken.
Once our coloring was finished we started into today's craft.  We made chickens out of baby food jars.  Who thought, hey???  And I must say we will be using this method a few times over the next couple of weeks while we work on our farm animals.

What you need:
  • Baby Food Jars
  • Craft foam in orange (or you can use scrap construction paper)
  • Tacky Glue or glue gun (I would recommend that you use one of these, we used white glue and it wasn't the easiest!)
  • pompoms in the color yellow
  • yellow feathers
  • wiggle eyes
  • scissors
Directions:
Clean baby food jar. Remove label. Fill with pompoms to make the body of the chicken. Put the lid on and turn it upside down. Glue on wiggle eyes. Cut  beak and feet out of foam and glue in place. Glue 4 to 6 yellow feathers to the back side of your jar sticking up to make its tail.

We also listen to the story Chicken Little today.  As sad as it is, I have what seems like a million and one books in my house and I do not have Chicken Little!  So I found one on the computer and we watched it.  The kids really enjoyed watching it, as for the fact that they know the computer is off limits here, so when they do get to use it a bit, its sure a treat for them.

Author: Christianne C. Jones

Feel free to check out more pictures at Ducky's Photos of today's craft !

Friday, February 25, 2011

Salt Dough Creations

On Tuesday the children and I made salt dough cut outs.  What fun that was!  I made the dough and cut it into equal pieces for the children, rolled them out and tossed all our play dough cutters into the middle of the table and let them go to town.  Once they had cut out what they wanted to, and lets say I rolled that dough out at least 50 times, between all the children, we placed our pieces on cookie sheets and baked them.  Half my children left just after lunch (with no school the girls dance was moved to the middle of the afternoon, instead of after school like usual) so I decided that we would wait until today to paint our master pieces.

Now today was the special day to paint these little trinkets.  Out comes the large garbage bags to cover my table, the 14 jars of paint and all the paint brushes I could find around the house.  To town the kids went with painting.  What kid doesn't like to paint????  Once we were done painting our cut outs on to what else.... FINGER PAINTING of course.  What a blast, what a mess!  But the joy they had doing all of it and the joy I had cleaning off 6 kids and all the paint brushes. 

Here's the recipe I used for our salt dough:
Ingredients: (I tripled the recipe and found it was more then enough for 6 kids)

  • 1 cup of fine salt
  • 1 cup of flour
  • 1/2 cup of water (may add more)
Instructions:
  • In a large bowl, combine the salt and the flour
  • Make a well in the salt/flour mixture and add the water
  • Knead until smooth and shape into a ball
  • When not in use, wrap in plastic or store in an airtight container 
  • Bake at 350 F for 10 minutes or until hard
HINT: To get a softer dough you can add more flour. Adding more salt will lend a more granulous affect. To add color to your dough, use different types of flour or add food coloring or paint.
Knead to get an even color.


Additional pictures are displayed on: Ducky's Photos